If you just got AdSense approved, you will get "AdSense at Risk" notification which can be solved with ads.txt file. Learn the steps here.
You are here; probably you have recently gotten AdSense approval for your website. So, my hearty congratulations.
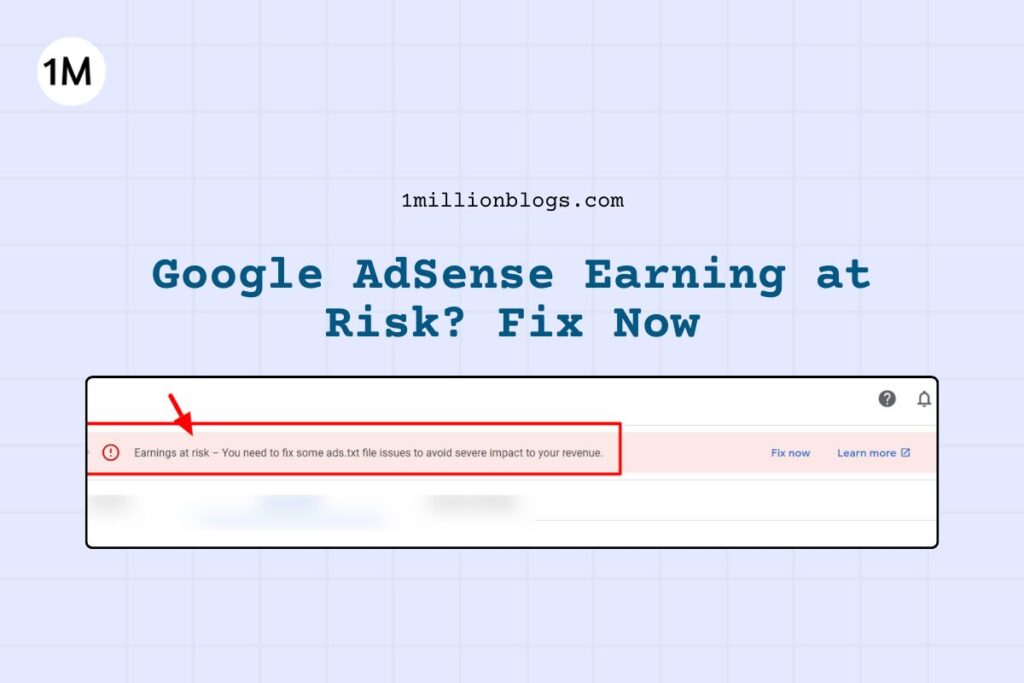
And, after AdSense approval, everyone encounters this notification of “Earning at Risk” on their AdSense dashboard. As a beginner, we all start worrying, and it even ruins our joy of having AdSense approval.
Don’t worry; there is nothing to panic about.
I will guide you on how to fix the AdSense “earning at risk” issue step by step. It won’t take more than 2 minutes to fix this. And this guide is for WordPress website owners.
Let’s start!
What is Ads.txt File Issue?
Google AdSense is a Google service that lets publishers (like us bloggers) earn money by displaying ads on our websites or blogs. These ads are from businesses or companies called advertisers. These advertisers pay Google, out of which Google keeps 32% and gives publishers 68%.
There is a need of transparency between all of these involved parties. Ads.txt is that file which helps in this.
Also, adding an ads.txt file is not a compulsory action. It’s Google’s recommended action. If you don’t fix it, there will be a severe impact on your earnings. However, your AdSense will work normally.
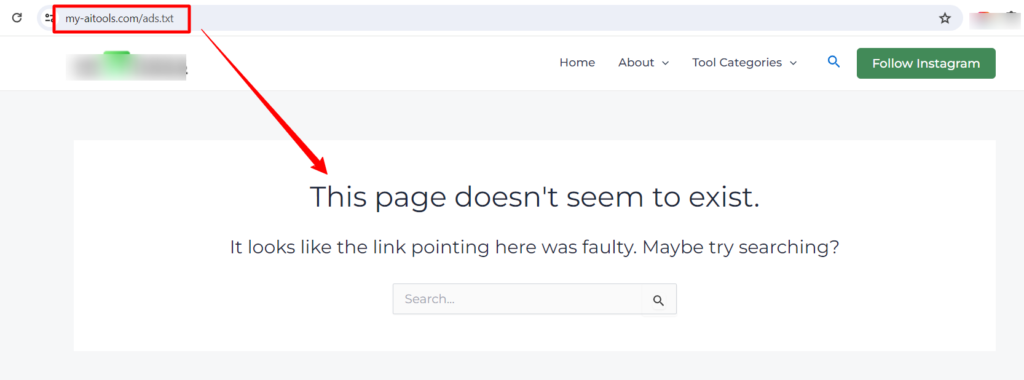
To check if your ads.txt is fixed or not. Go to your browser and search this address:
yourdomain.com/ads.txt
Or simply add ads.txt at the end of your root domain name.
If you see, “the page doesn’t exist,” Then, your ads.txt is not yet fixed (as shown in the above screenshot).
In the most simple terms, adding the ads.txt file ensures the displayed ads on your website are through the authorized seller (i.e., Google AdSense). If all your displayed ads are through Google AdSense, you make 68% of the budget from the advertisers.
But, without ads.txt, there is no transparency for the advertiser to identify the publishers where their ads are displayed, hence they invest less.
Now, let’s just straight to the steps to fix “earning at risk”issue.
Step #1: Create Your Ads.txt file
Open your AdSense account and click on the “Fix Now” button.
Next, open your notepad and create a new file. Paste this copied code and save this notepad file with the “ads” name.
In the next step, we will upload this “ads.txt” file to our root domain folder.
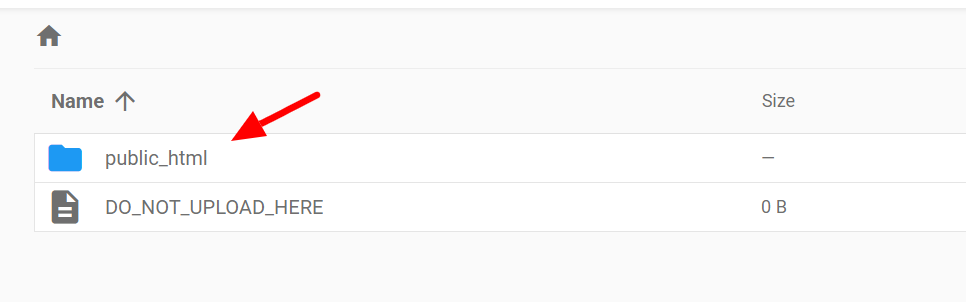
Step #2: Uploading the file in Root Domain
The root domain folder is where all the files on your website are located. And this is where you need to place the above “ads.txt” file.
Since I am using Hostinger, there may be some difference in the interface. But most of the hosting companies have this “File Manager” option.
For Hostinger users, go to the “websites” menu and click on “manage” for the website on which you are setting up AdSense ads.txt.
The dashboard for the respective website opens up. Click on the “File Manager” button.
A new tab opens up with your folders.
Click on public_html.
This is where all your root domain folders are saved. And this is where we need to upload the “ads.txt” file.
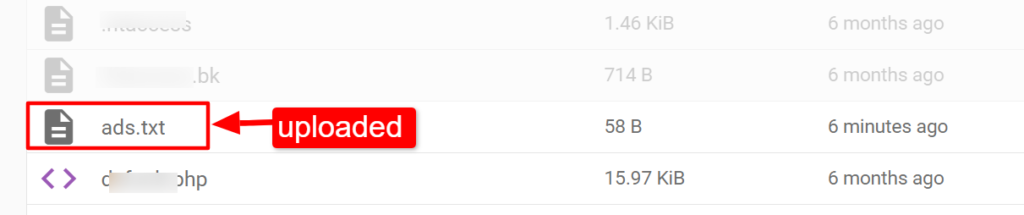
On the top right, click on the upload icon.
Select the file from your device and upload it.
Once uploaded, it appears in the public_html folder, as shown below.
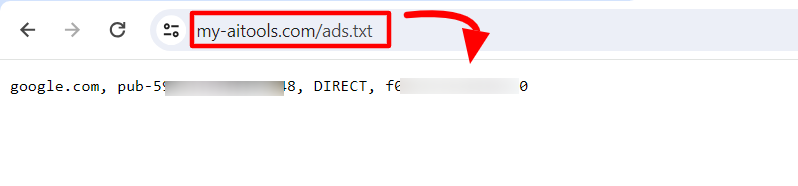
In order to check if you have successfully uploaded or not.
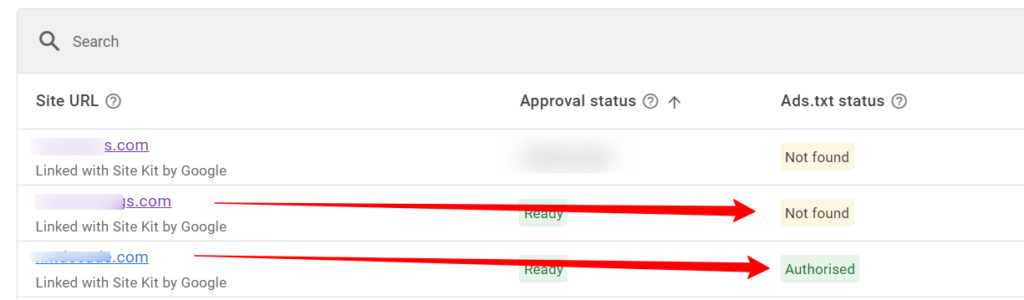
Go to your browser tab and search for yourdomain.com/ads.txt, as I have searched for my blog.
If you get a white page with your ads.txt code, then it was successfully uploaded.
The “Earning at Risk” notification may not immediately disappear from your AdSense dashboard. It will take 3-5 days for Google AdSense to detect your ads.txt file. It usually disappears in the next crawl.
Once Google detects your ads.txt file, you will see “authorised” in your ads.txt status.
End Note
I hope your ads.txt problem is solved. If you are still facing any problems, whether with ads.txt or any other blogging topics, reach out to me.
Remember, AdSense is the game of traffic. More traffic, more revenue. So, check out our marketing special.