In order to scale up your WordPress website, add new WordPress user roles and allot task such as writing, development, SEO, etc.
WordPress is a very powerful CMS. It works so well at all levels, from a solo blogger to a full-fledged business or eCommerce.
As a solo blogger, it’s obvious to have admin access to manage everything. But when you have a team, how is this access shared?
WordPress has this feature for adding new users. And, in this article, I will guide you through the steps to add new users using their email addresses and give them permissions based on their roles.
As a blogger, it’s important for you to understand the importance of WordPress user roles. These are the cases when you should use this feature:
When hiring content writers to write blogs and articles,
When hiring a content head, So that he or she can manage multiple authors.
If you are hiring a WordPress developer for page development or plugin setup, add them as an admin to give them full access to your WordPress.
When adding a customer or follower, add them as a subscriber.
The WordPress user role lets you expand your team, divide tasks, and boost your blog or business on the WordPress CMS. It’s a highly useful feature for the scalability of your WordPress website.
Note: Avoid giving admin access to unknowns. Give it to your trusted connection for the required time.
Available User Roles
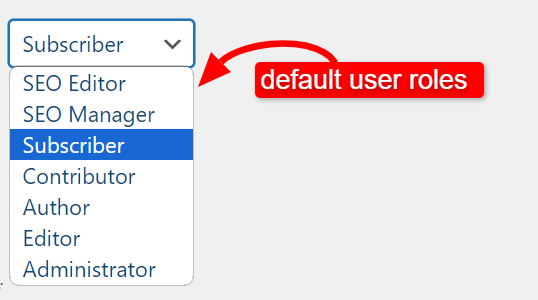
By default, WordPress has the following user roles:
Administrator
Editor
Author
SEO manager
SEO editor
Contributor
Subscriber
Admin has full access; they can add and remove users, change themes and plugins, create new posts and pages, etc.
Editors can manage pages and posts. They can delete and create new pages and posts. But they are restricted from changing and customizing themes or plugins.
Whereas authors are for individual writers, They are restricted to their own blog posts. Authors cannot access the posts of other writers.
Similar goes with the SEO editors and managers.
Contributors have very limited access. This access is usually given to someone who rarely publishes on our platform. They are mostly guest-posting authors or interns. They can draft articles but have no access to upload images, media, or even publish a blog. They have to send it for review, either to editors or admins.
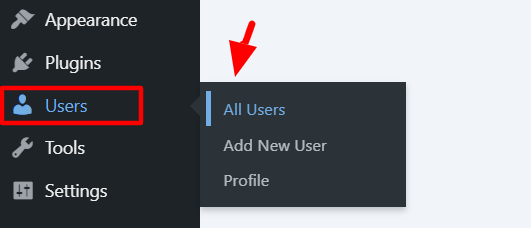
On hovering over user menu options, you have three submenus as follows:
All users: list down all the current users of your WordPress.
Add New User: This gives you a form to add a new user.
Profile: This helps you edit your own profile.
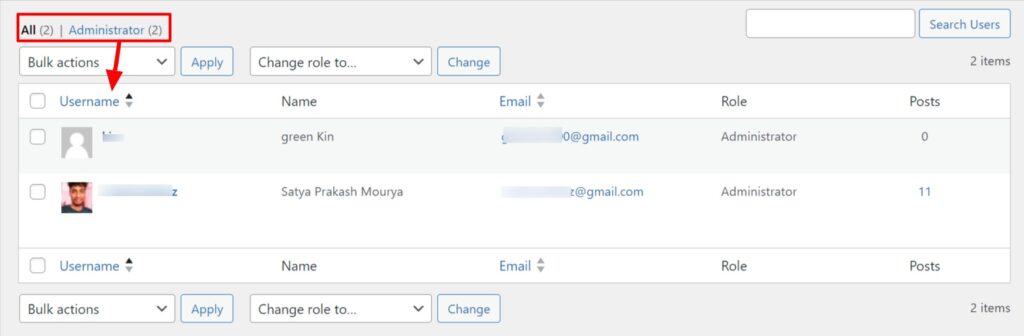
The first option, all users, is shown below in table format with two users listed. Respective usernames, names, emails, and roles are displayed in the columns.
Since our objective is to add new users to WordPress, click on “Add New User.” You will see this option on the top of the list of users page or in the drop-down menu.
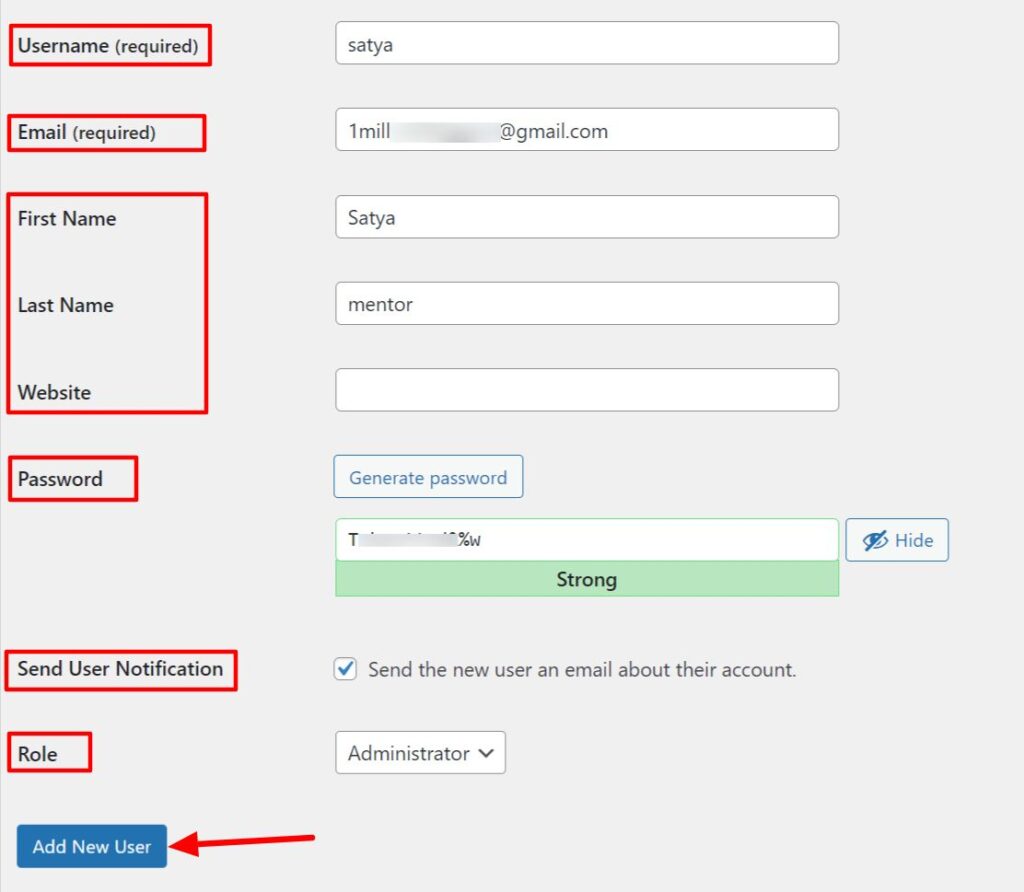
A detailed form opens up, asking for the necessary details to add a new user.
The options are:
Username: This is required and cannot be changed later. Usually, write the first name here.
Email: This is the email address of the new user.
First name, last name, and website—enter in the respective areas.
Password: Here you can generate a new password for your new user. This can be changed at any time.
Send user notification: tick yes, and your newly added user will receive an email at the same address you have entered above with their password and username.
Role: Pick the role you want to allot to this new user. It can be admin, author, editor, subscriber, etc.
After filling out these details, click on the “Add New User” button at the bottom.
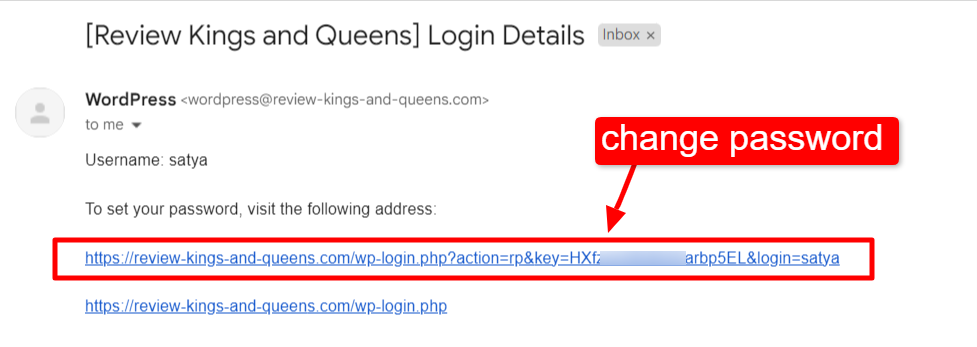
The user will receive an email with two links:
To create a new password for himself or herself.
To login using the password set by the admin.
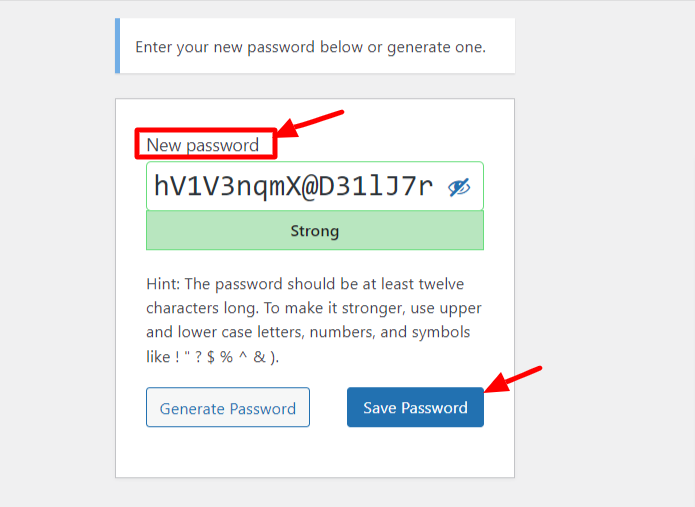
Let’s say the user wants to create a new password, then he or she will click on the first link. A page opens up asking you to create a new password.
Type a new password and click on “Save Password.”
Once saved, go to the login page and enter the username, email, and password. The new user will be able to access WordPress with the assigned role.
Note: If a particular user is not needed, delete that user from the “All Users” options. Simply, hover on the username, click on red-colored “delete” button.
WordPress will ask you to transfer the post and pages in this user name to a new user. Select the user, and confirm the deletion.
Wrapping Up
I hope you have understood the working of user roles in WordPress. It isn’t that complicated. However, its important for scalability and team-growth.
If you still have any doubts, feel free to ask in the comments. If your query is general, reach me out or check my blogging mentorship page. Start with session #1 if you are starting fresh.