Check our latest step by step guide to purchase a domain name from GoDaddy. Its the best choice to register a domain name in 2023.
Every website needs a registered domain name. A lot of companies offer domain registration services, however, GoDaddy is the best choice among all.
So, I will show you clear, hassle-free steps to buy a GoDaddy domain name in the article. It takes not more than 5 minutes.
Note:Before you jump on the steps, here’s a profitable tip to save your few bucks. That is; if you haven’t purchased hosting yet, then check Bluehost hosting plans and get your first domain name for FREE along with the hosting.
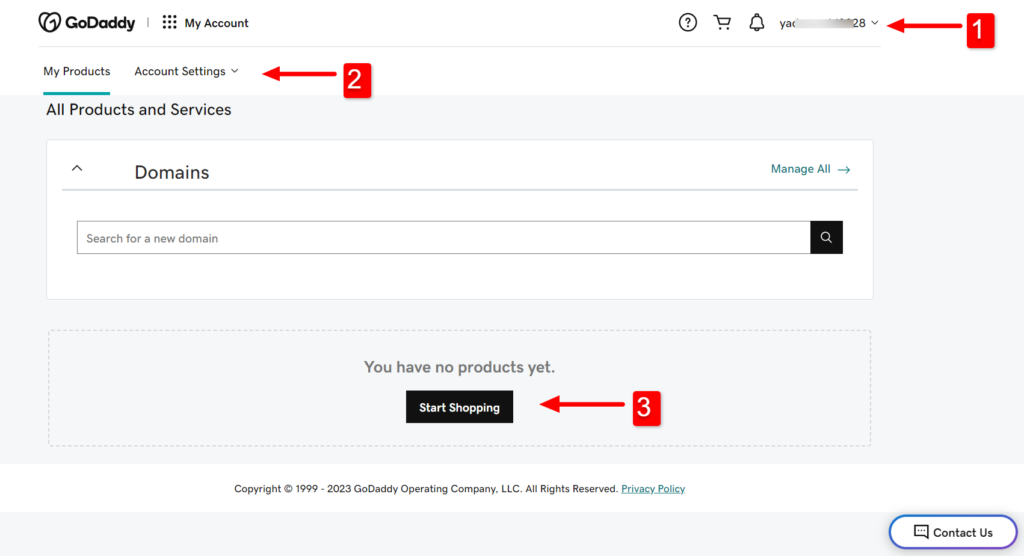
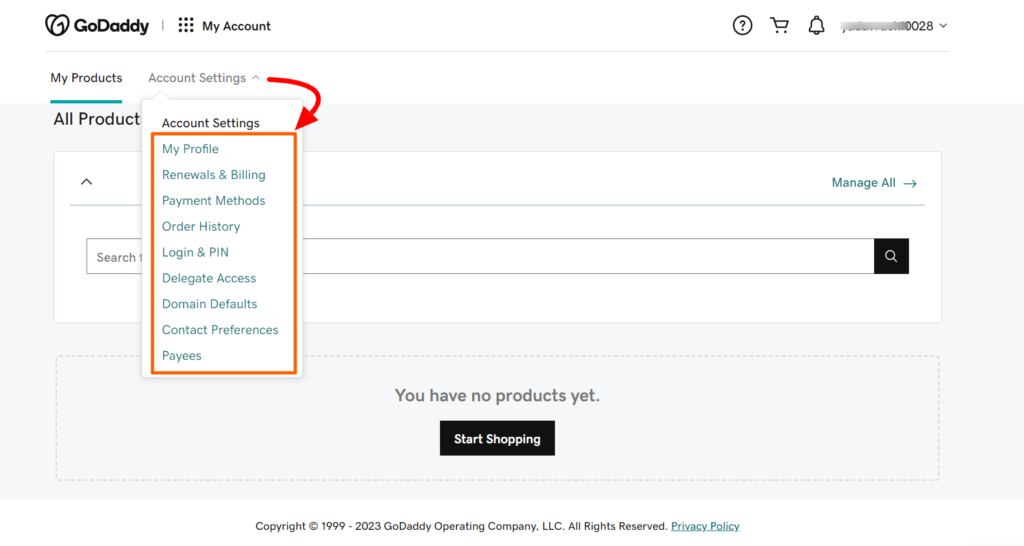
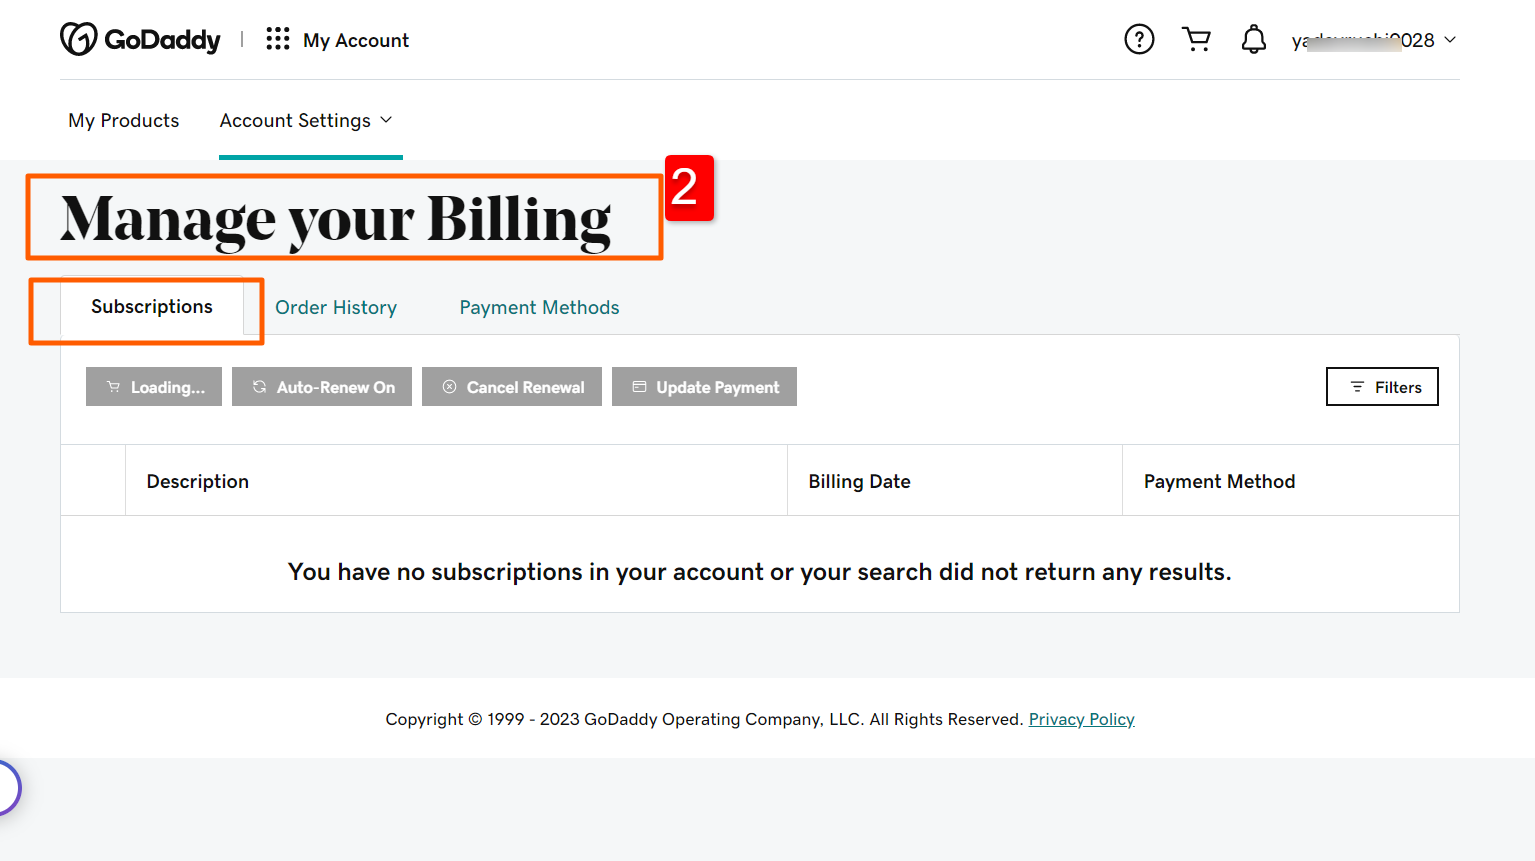
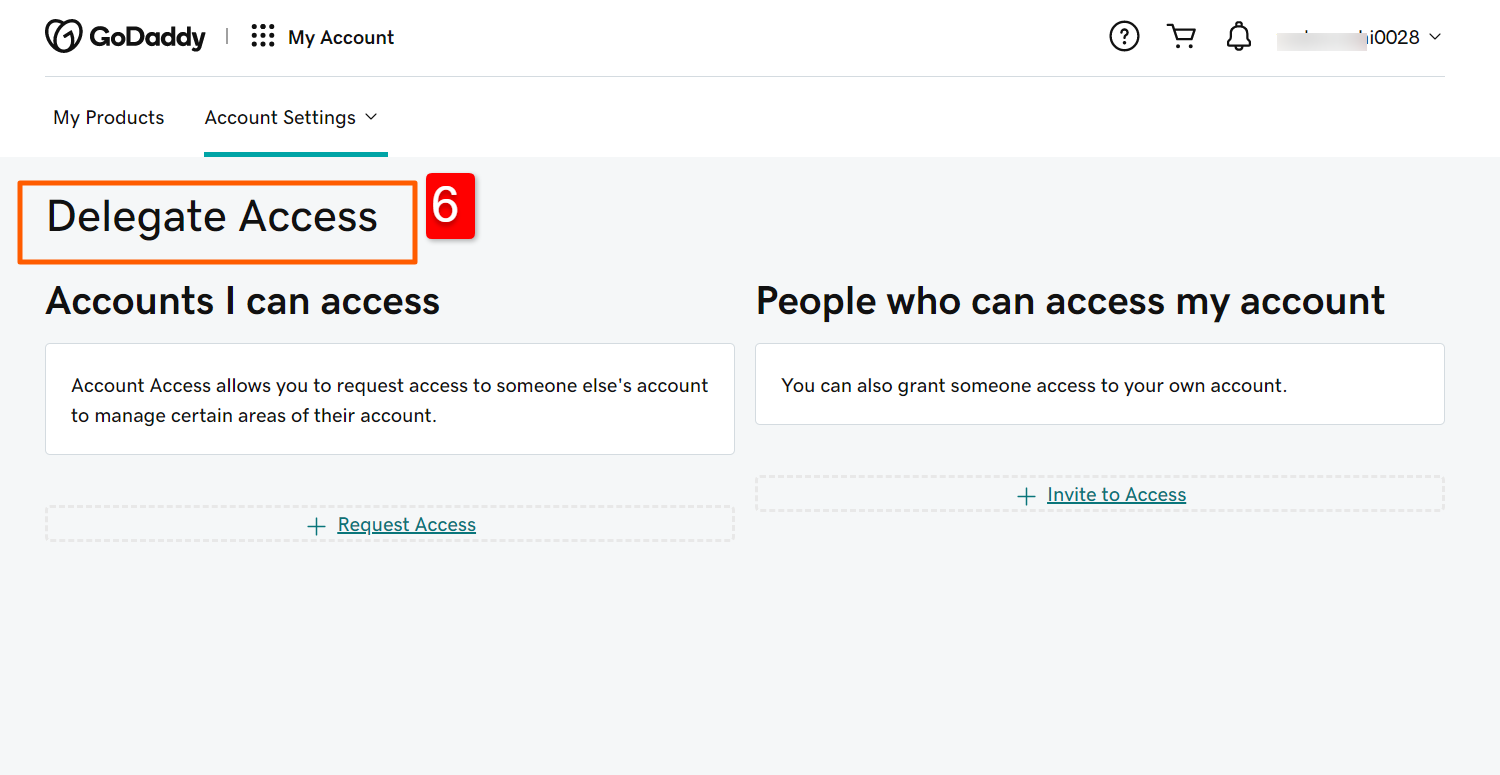
Now that your know all about our GoDaddy dashboard options, let’s register a domain name.
Step 2: To purchase a domain name
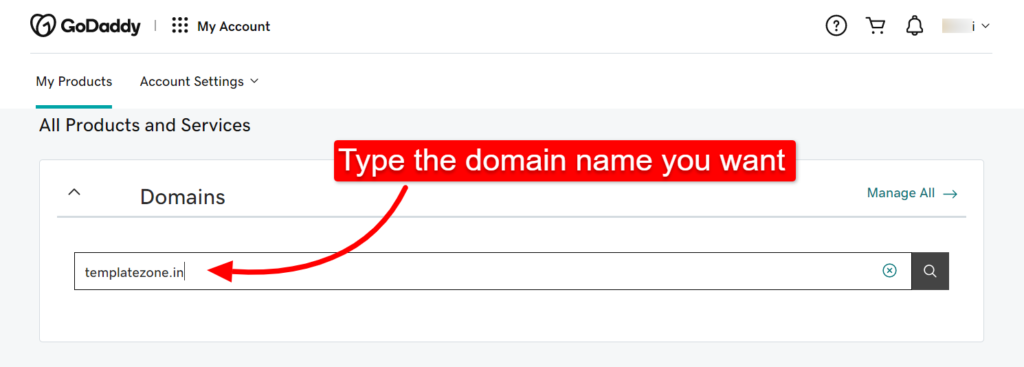
Every domain name needs to be unique. Hence, you would need a unique name before we start purchasing it.
We will go with: templatezone.in
Type it as shown below.
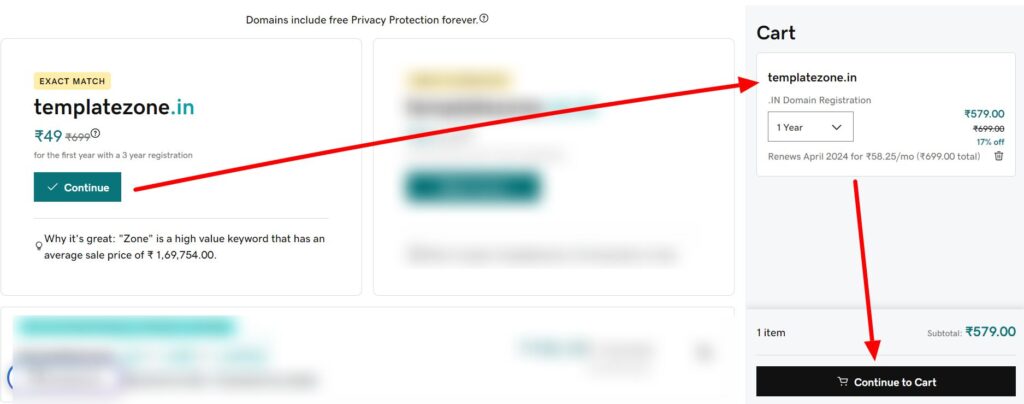
Click on the search icon and look if the domain name is available. If not, please come up with something else. Anyway, it is available in our case and so, click on “Make it yours” or “Continue“
Note:GoDaddy is very clever with their PRICING. Don’t expect that your could get a domain name at 49₹. This offer is only if you purchase a domain name for 3 years. And, 49₹is only for first year, while 699₹/year for next 2 years. Total of (49₹ + 699₹ + 699₹) = 1447₹
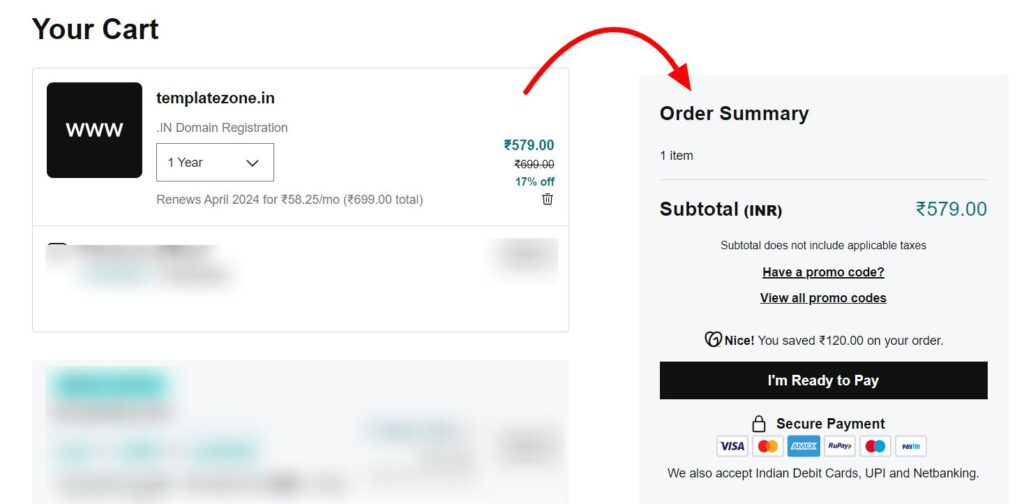
The domain name will appear in your “Cart”. Here, you can see the subtotal amount and the “I’m Ready to Pay” button.
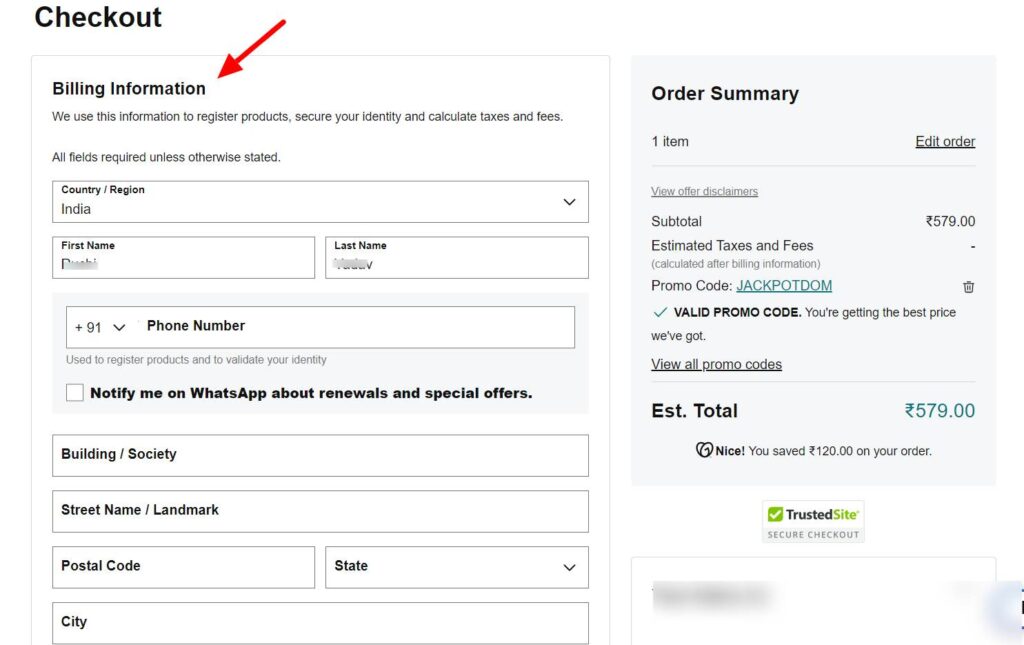
For the last step, you’ll be directed to the checkout page.
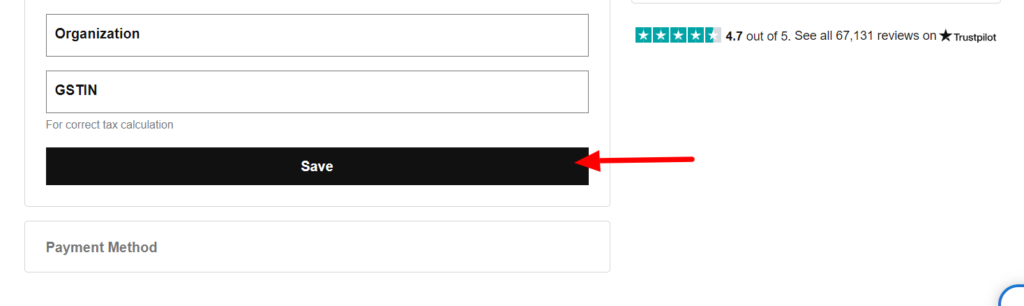
Fill in all the crucial details such as name, postal code, address, etc. and “Save” it.
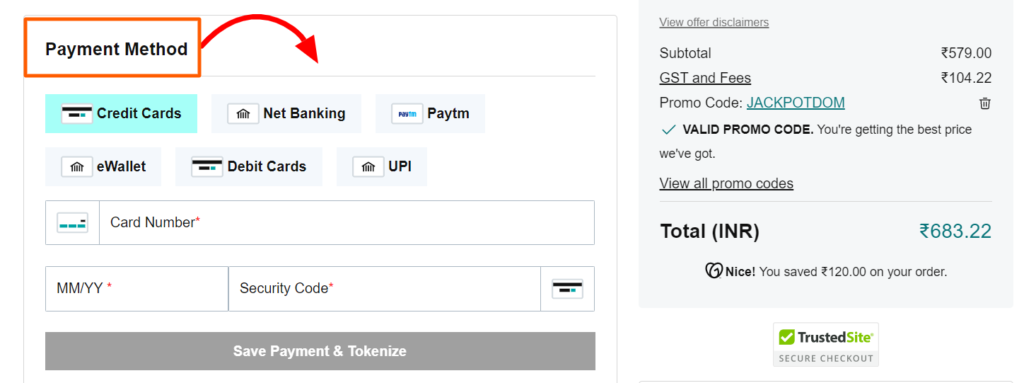
Next, on the same page, comes the GoDaddy’s payment methods — a total of 6.
Select one and enter the details of your card/UPI.
Save the payment options and tokenize it
The final step — you’ll be able to see the final amount to pay (including all the fees and GST). And so, proceed to get your new domain name.
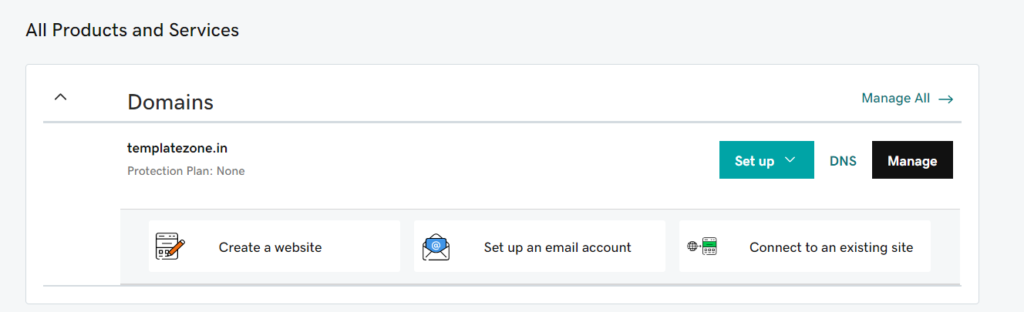
Once you have successfully paid, you could now see your newly purchased domain name under “My product” menu.
Congratulations
You have successfully purchased a domain name.
I’ve said it before — GoDaddy is the best for domain names but never for hosting. And so, I’d suggest linking your domain name to Bluehost’s or any other better hosting provider.
In our next blog, I’ll tell you all the steps to connect your GoDaddy domain name with Bluehost hosting. Stay along, till then!
Join our Newsletters & stay ahead in the blogging journey with our knowledgebase.
Thank you for Signing Up
Note: This article contains an affiliate link which if you use will earn us some commission, while you loose nothing.