The first step of building a WordPress is to pick a theme, install and activate. This article will explain you two methods of doing it.
The steps to install and activate a theme in WordPress is quite simple. WordPress allows you to install multiple themes to your WordPress site, but only one can be active at a time.
So, as a beginner, it’s okay to install multiple themes and activate one at a time, check its customization options, experience its feasibility for your site and try others until you find the best one for yourself.
But, how to install and activate a WP theme?
In the article, we will learn the steps for installing themes in different ways. In case you are still not ready with a list of good theme, check this: List of top 10 themes to try
Note: Theme is like the pillars of your website’s structure. Changing the theme for your existing website may disturb your website menus, pages or overall structure. Hence, do it under expert assistance. But, no worries for the new website. Try as many as you want.
Steps to install theme:
We would learn two methods to install a WordPress theme. First one, the simple one directly on WordPress dashboard, and second, from cPanel file manager.
Method 1: WordPress Dashboard theme options
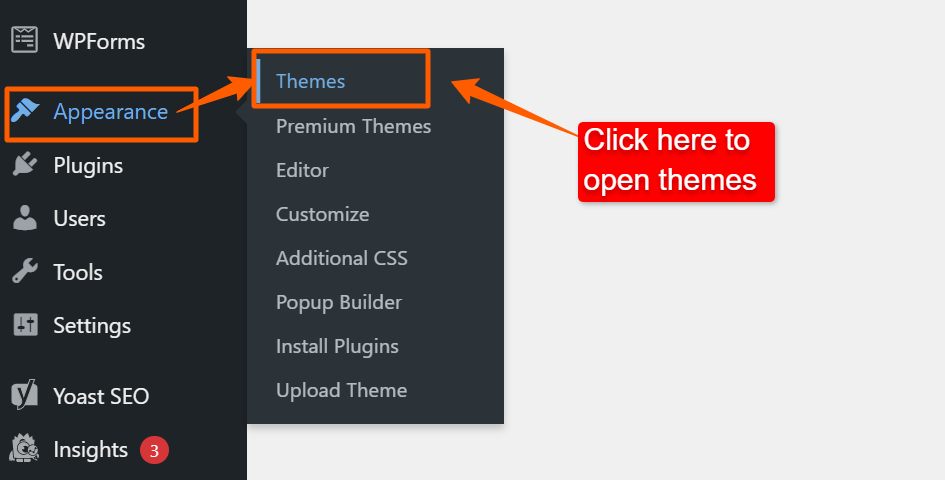
In the vertical menu bar, navigate to “Appearance” option and click on “Themes” as shown in the below screenshot.
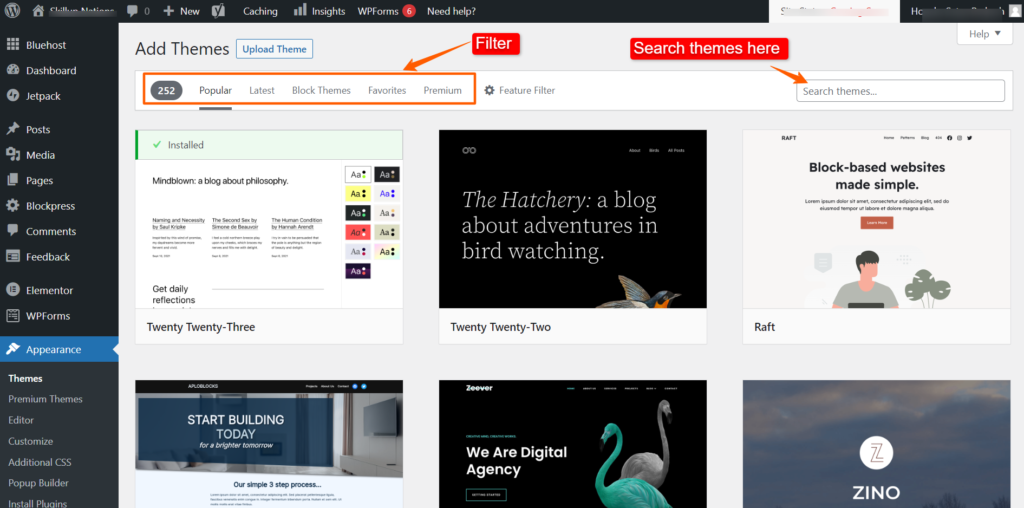
The themes dashboard would open up in the right-side area. Here you could see your “Active” theme, other install themes and “Add New theme” options.
Since you are here with an intention to install a new theme, so click on “Add New Theme”.
WordPress has more than 10,000 free themes. You could access any of those theme either by typing its name, or explore the list using the available filters.
To read more about any of the specific theme, hover on it and click on “Details & Preview”. Or click on “Install” button to use it.
The detail page contains following options:
“Install” button to install the theme.
Name of the theme and developer of the theme.
Rating of the theme
Version of the theme
Description of the theme.
“Collapse” button to preview the theme in full screen.
Install and active the theme you like to try.
Now, in order to check the customization options of the installed theme. Go to the “Appearance” menu again, and click on “Customize”.
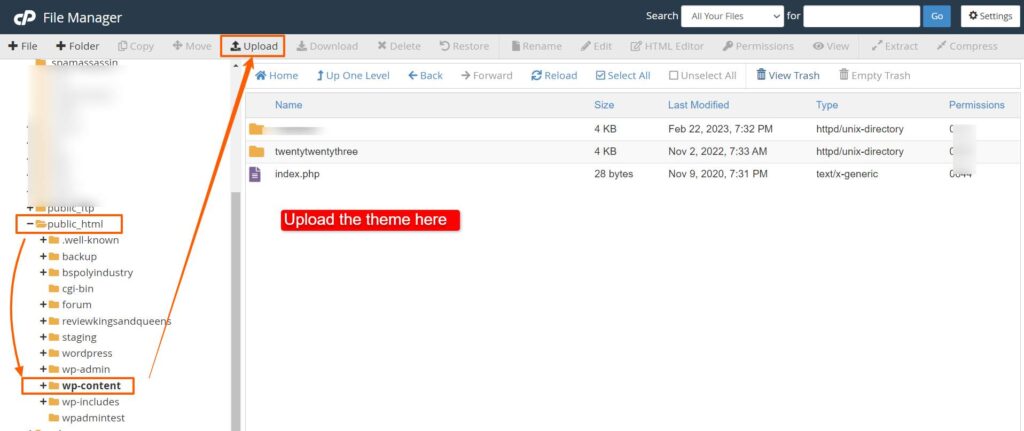
Method 2: From File Manager of cPanel
If you fail to install a theme from your WordPress backend, use this method to upload a theme manually through your cPanel.
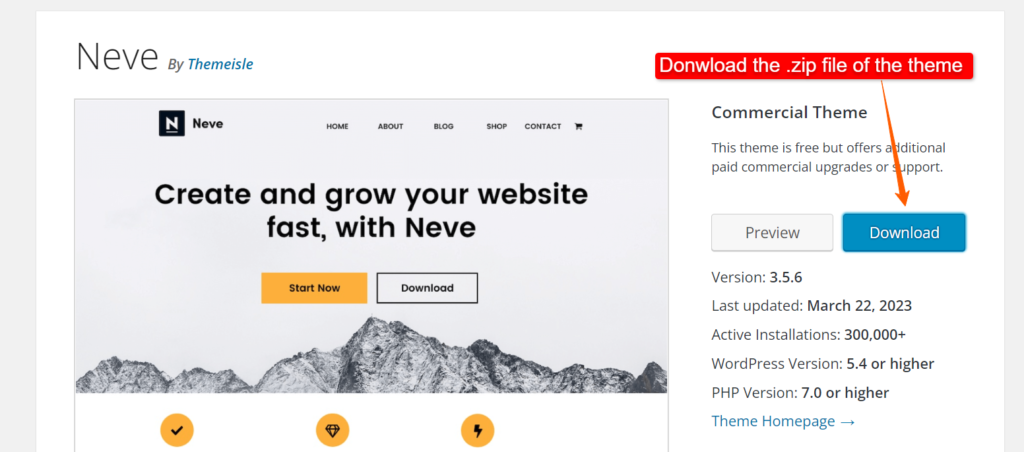
First, download the theme from WordPress.org themes by clicking on the download button. The .zip file will be downloaded to your computer.
Now, login to your hosing account.
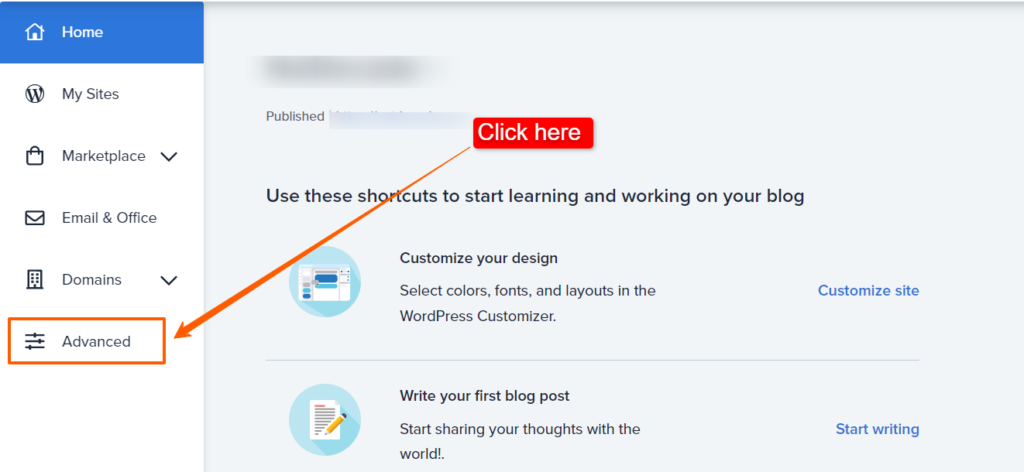
For Bluehost users, click on the “Advanced” option to open your cPanel.
Then, follow the following path.
File Manager > Public_html > wp_content > Themes
And click on “Upload” button in the menu bar of the cPanel.
Select the .zip file of the theme. After successfully uploading, the theme will be available for you to access it on WordPress dashboard.