A domain-based email looks more professional and helps in promoting your brand. Learn to create them for free in Bluehost.
Having a professional email address is important to win leads and create a trustworthy impression. A business email address is an email id that has your domain name. For example: Let’s say your domain name is “1millionblogs.com”, and your email address can be “contact@1millionblogs.com” or anything else with a different username.
Using an email address with your own domain has some benefits as mentioned below:
It looks more professional than Gmail or Yahoo mail.
You can promote your brand name.
It is easier to remember.
It shows authenticity and reliability.
Usernames are available
There are multiple ways to create a domain-based email address. In this article, we will learn to create them in Bluehost as it is one of the best hosting services which offers free email addresses with its basic hosting plan.
Let’s start!
1. Log in to your Bluehost account
Log in to your Bluehost account by entering your credentials.
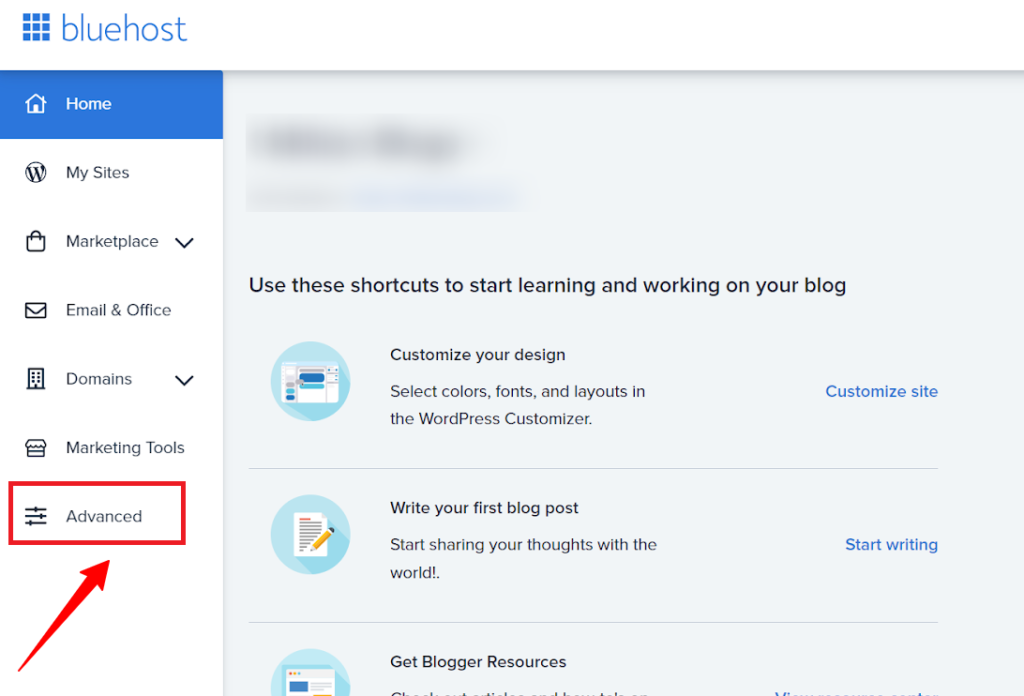
2. Click on Advanced
Scroll down and click on the “Advanced” option given at the left bottom side.
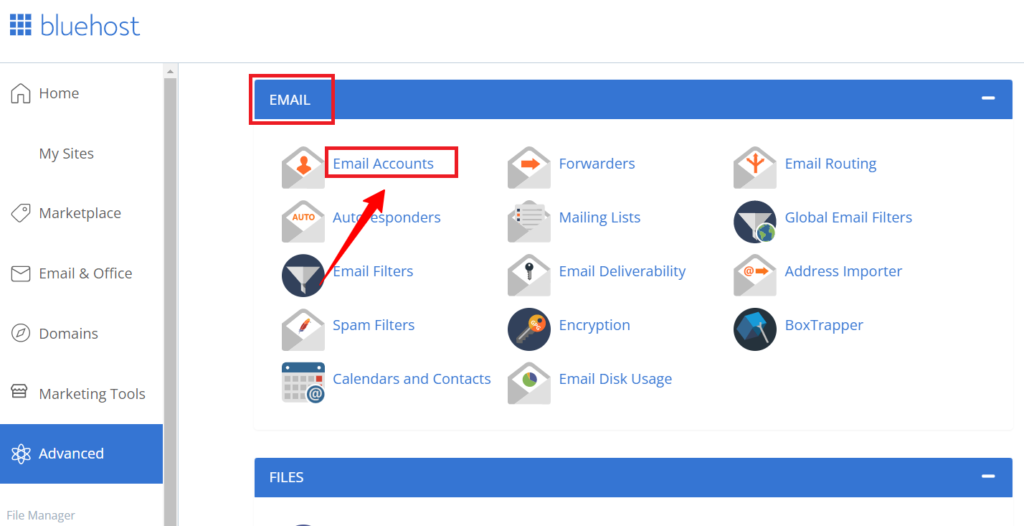
3. Click on “Email Accounts”
You will see many options. Click on the “Email Accounts” option.
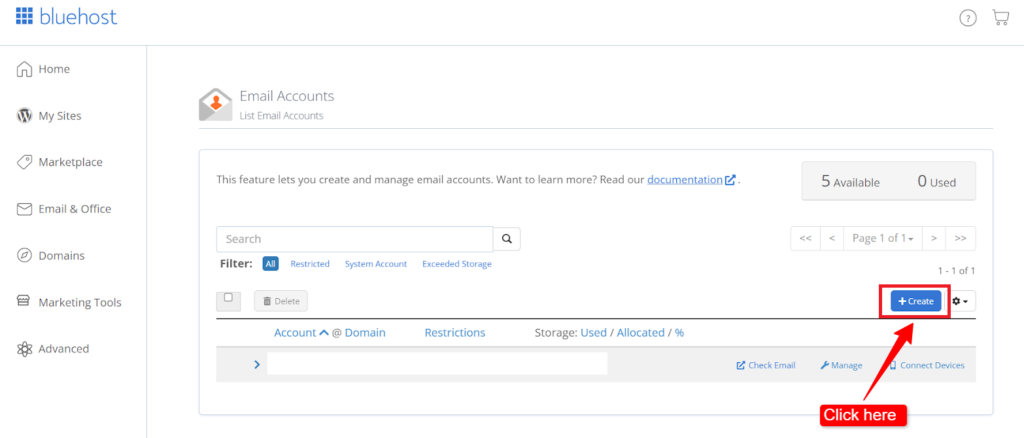
4. Click on “+Create”
A new window will open up. Click on the “+create” button given at the right side to starting creating your domain-based email.
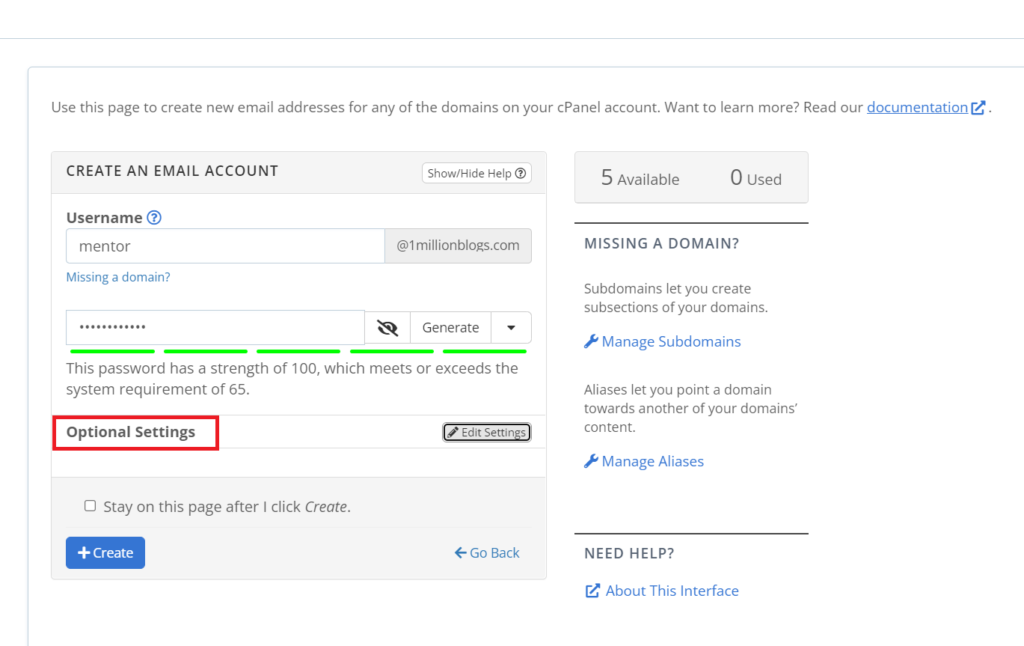
5. Enter username and password
Now, enter the “Username” in the given box. Some of the famous username for professional email which you can use for your business as per your requirements are:
contact@yourdomain.com
hello@yourdomian.com
yourname@yourdomain.com
help@yourdomain.com
support@yourdomain.com
connect@yourdomain.com
admin@yourdomain.com
sales@yourdomain.com
info@yourdomain.com
career@yourdomain.com
hr@yourdomain.com
After entering a username, create a strong password.
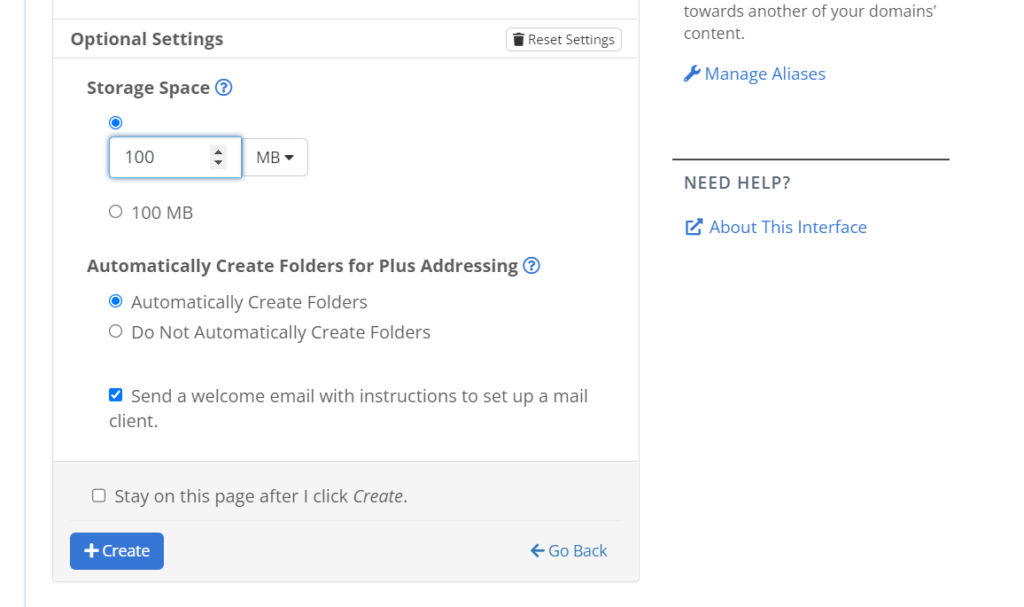
Optional settings
Here you can set the storage limit for your email account, it can be 100 MB or 500 MB or you can set it to unlimited. Tick on the “Automatically Create Folders”. It will create a separate folder in your hosting file manager for your email storage.
Now, click on the “+Create” option.
6. Email created
Congratulations! You have successfully created a domain-based professional email address. You are all set to grow your businesses and interreact with your clients and customers better and professional.
Conclusion
You can create more domain-based email addresses with your Bluehost package and manage them accordingly.
In the next article, we will learn to connect your newly created domain-based email with Gmail environment, so that you can send and receive email using your Gmail environment.