Creating a WordPress menu involves two major actions. Firstly, name your menu, add menu items to it. Secondly, assign a location
A menu is a navigational component of your website that appears in the header section. Your menu contains links to important pages, services, and products, as well as social and blog posts. It facilitates visitors’ easy discovery of pages or posts.
It’s very important for any blog or business website.
Before I start guiding you on how to build your WordPress menu, I want you to understand the difference between the header and the menu. For example, the screenshot below is a header of my website, “nxtdecde.com, while the red-marked areas are menus.
Your menu is a part of your header. Headers involve the logo, social icons, search icons, buttons, and menus. Your menu is a subset of your header.
And, in this article, I am going to teach you to create your menu rather than your header. So, let’s get started.
Steps to Create a Menu
Creating a WordPress menu practically involves two major actions. Firstly, name your new menu and add elements, pages, links, etc. to it. Secondly, assign a location for the created menu.
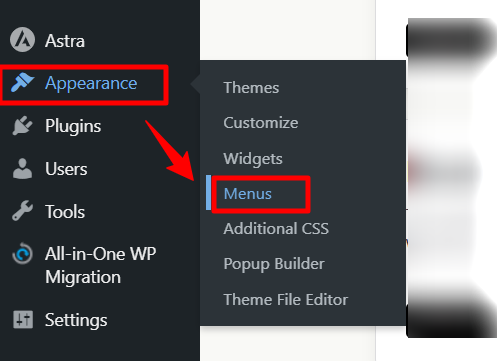
Open your WordPress dashboard and click on Appearance > Menus (as shown in the screenshot below).
Your panel to create a WordPress menu appears.
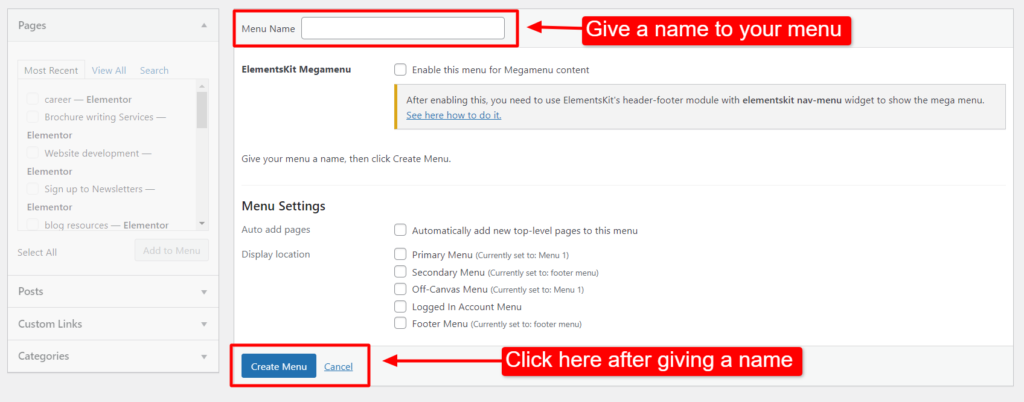
If you wish to edit any of your existing menus, select them from the dropdown; otherwise, click on “Create a new menu” to start creating a new one.
Give a name to your newly created menu.
It’s advised to name your menu in a way that you can easily identify it when using it later. For example, the menu for the header can be named “Header Menu” or the menu used in the top bar as “Top Bar Menu.”
Click on “Create Menu” after giving it a name.
An empty menu will be created. And our next task is to add menu items to this empty menu.
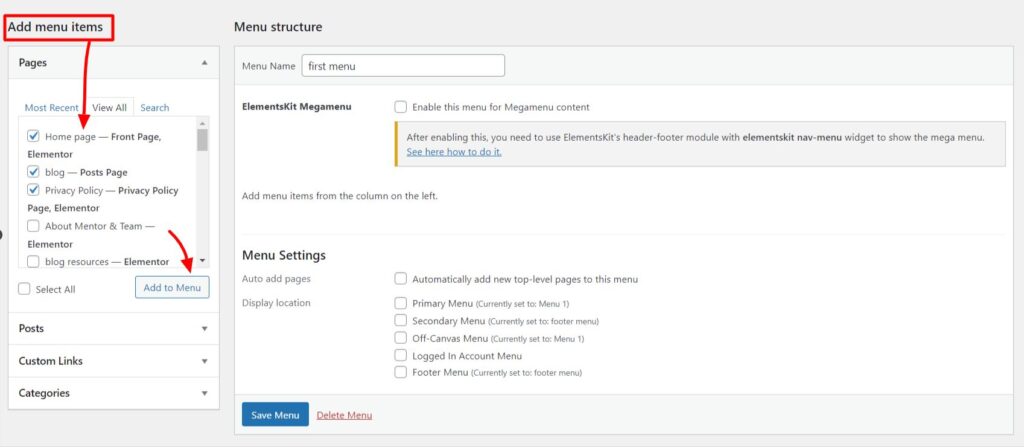
There are four types of items that can be added. These are:
Pages
Posts
Custom Links
Categories
Adding pages, posts, and categories is pretty simple. Simply tick the page, post, or category and click on “Add to menu.”
The selected items will be added to your menu.
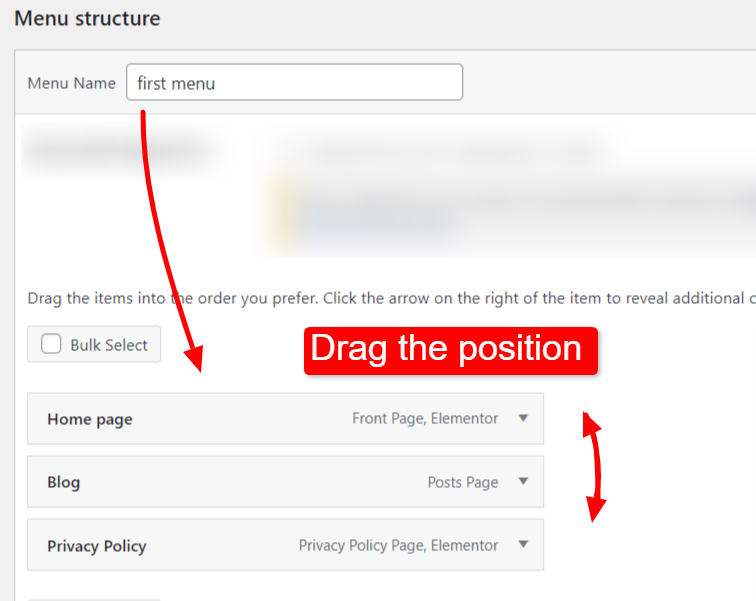
If you are not satisfied with the order of the menu items, simply hold and drag up or down.
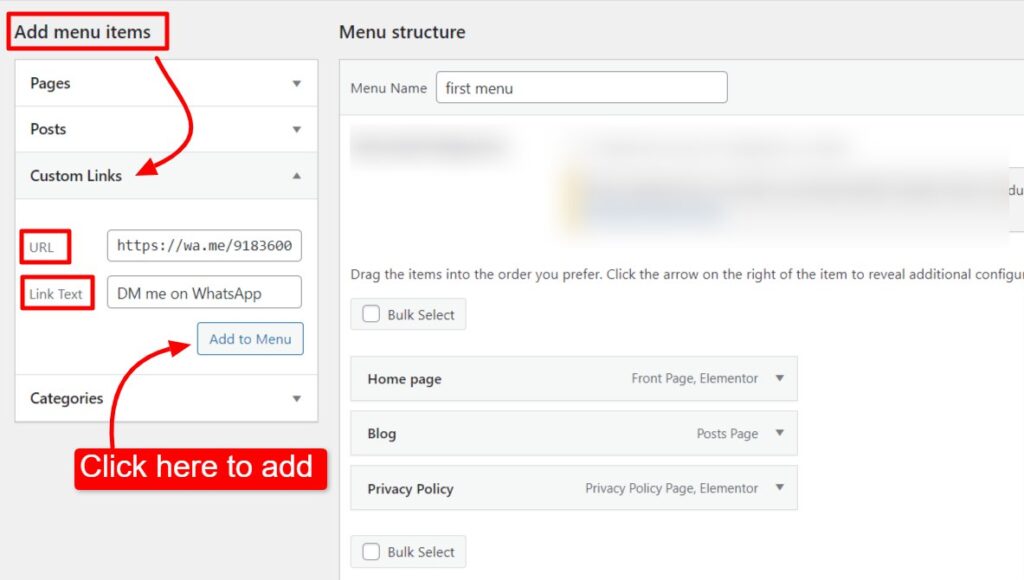
To add an external link to your menu item, select the “Custom links” option and enter the “URL” and “Link Text.” Click on the “Add to menu” button.
In our example below, we have added a WhatsApp link to our menu.
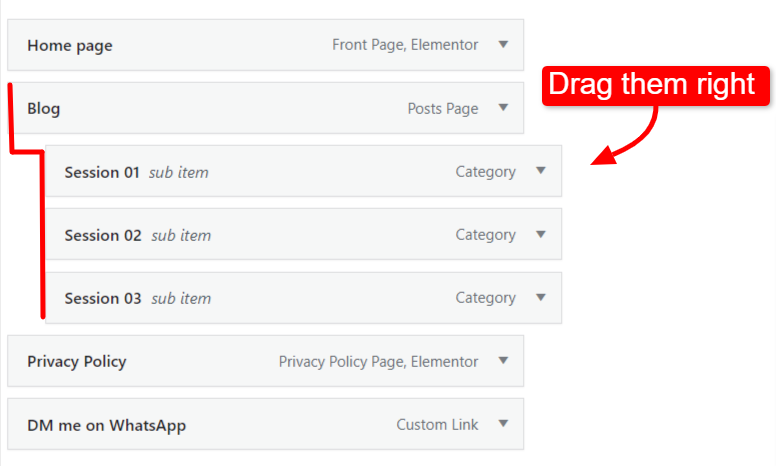
Another useful thing that you must have observed on different blogging websites are “dropdown menus.” You probably want to make one for your blog menu.
Simply add your items and drag them right under one parent menu item. Save it, finally.
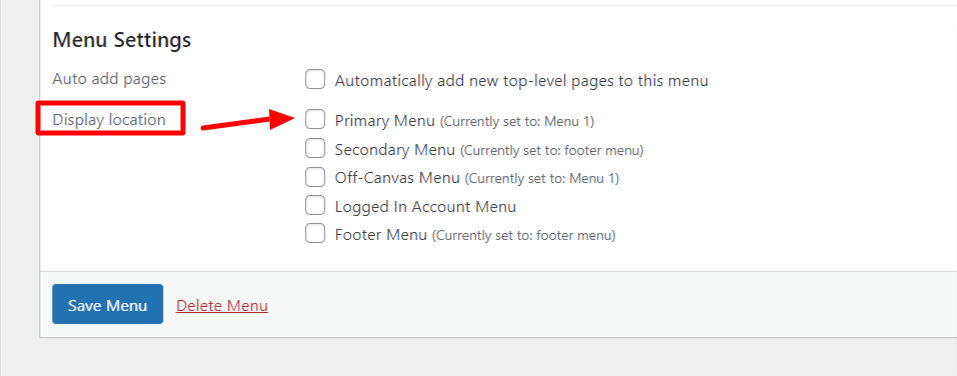
Finally, after adding menu items of your choice and setting up your drop-down menu, you need to set the location where this menu will appear.
WordPress has several locations for menus. For example, primary menu location, secondary menu for footer, off canvas for mobile menu, and others for logged-in users.
In our case, we will proceed with “Primary Menu.”
Save it.
Reload your website to check your newly created WordPress menu.
Congratulations! You have successfully set up your first menu for your blogging site. Editing the typography, side, color, hover color, etc., is set using theme customization options. I will write a separate blog on how to set and customize your header.
Important Tips when Creating a WordPress Menu:
When creating a menu for your blogging website, add relevant pages, posts, or custom links that matter most for your blog or business.
A drop-down menu can be two-step or three-step based on your requirements. But don’t set a three-step sub-menu in your drop-down, as that will be too lengthy for visitors to navigate.
Don’t add too many menu items; otherwise, your menu will overflow your screen.
Mega-menus are designer menus. They have images and graphics in the drop-down menu. I don’t recommend mega menus for beginners. Stay simple.
For a blogging website, common pages or elements that can be added are: homepage, about us page, blog page, categories, contact us page, etc.
Some Example of WordPress Menu
Almost every website or blog has one or more menus. I have some examples for you below.
“canaryvistaglobal.com” has mega menu options as shown below.
Here’s another example from my blogging student. Drop-down menu is for blogs while other menu items are normal pages.
Use these examples and plan your blog’s menu.
End Notes
I hope you have learned to create a WordPress menu after reading the steps above. If you are still struggling, reach out to me on WhatsApp for blogging mentorship.
Otherwise, try a couple of times to create a WordPress menu, and if you are unhappy with any menu, delete it and create a fresh one.
Keep working on your blogging goals. My best wishes.