Learn to add a floating sharing buttons using Add to Any share buttons plugin and take its benefits to boost traffic on your blogs.
Social media is a huge community and you could capture a good volume of audience and traffic from these social media platforms.
As a blogger, you are constantly sharing the links of your blog posts on social media platforms but often your reader loves your content so much that they have the urge to share it as well.
They might want to share it on WhatsApp with any of their friends, or on Facebook, or through Twitter(X), LinkedIn, etc. This is where “Add to Any Share Buttons” play their role.
It makes it easy for readers to share your content without any pain.
Why Sharing Buttons are Important?
Improves the readers experience; as readers don’t have to struggle to find the link of your article from the browser.
Improves your website traffic. If any reader with a good presence on social media shares your content, the traffic on your website increases due to his/her organic sharing.
It also remind readers on your blog to share. Every time they come across the sharing buttons while reading your blog, it subconsciously reminds them to share it.
So, let’s learn to setup “Add to Any Share Buttons” and take these above listed benefits.
Installing The Plugin
In order to install this plugin, go to Plugins > Add New.
Type the name of the plugin in the search box. The desired plugin appears as shown in the screenshot below.
Install and activate the plugin.
After successfully installing and activating the plugin, go to “Settings” option in your WordPress and click on “AddToAny” to customize the settings of the plugin.
In total, there are only two major setting page in “Add to Any Plugin” which are:
Standard
Floating
It’s important to understand the difference between standard sharing buttons and floating sharing buttons before we start exploring the respective setting options.
Standard sharing buttons are the one that appears at a particular defined positions of your website. For example, buttons at the top and bottom of the posts, or pages. Sharing buttons at the bottom or archive pages, or at the web stories.
Whereas, Floating Share Buttons floats over the screen, no matter which page of the website is open. Its doesn’t scroll with the scrolling of the page.
“Add to Any Share Buttons Plugin has two types of floating sharing buttons: Vertical and Horizontal sharing buttons.
We will first learn to set “standard sharing buttons” and then set up “floating sharing buttons”.
Standard Settings of Add to any plugin
It is quite simple to make these settings.
A total of 5 settings are enough to get the desired result.
First is the icon style. Here you get the option to set the size, and color of the icons and background. By defaults 32px is set for icon size and “original” is set for background and foreground color. Leave it as it is unless you have any specific color choice.
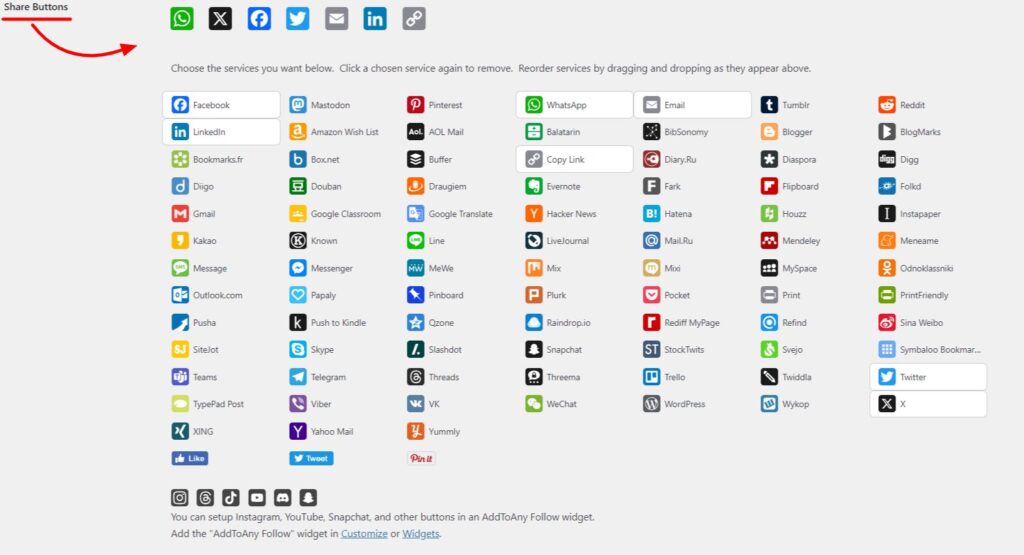
In the next option, you get to pick the social platforms that you wish to display. Add to Any Sharing Buttons plugins offers a good list of social media platforms to pick.
Based on your content, pick the icons by clicking on it. If you think your content is most likely to be shared on LinkedIn, keep the LinkedIn icon on top. Or if your content is something that is most suitable for WhatsApp, add that in the list.
Remember, too much options can confuse the readers. So, keep few best ones.
If you are still not convinced after picking the best 5-6 sharing buttons, then add the universal button.
Universal button is a “+ icon” that appears at the bottom of the selected social icons which opens up with all list of social platforms after the users click on it.
If you don’t want the universal button, click on “None”. Else set remaining options such as text, image URL and count.
“Sharing header” is the text that appear just above the standard sharing buttons. Here’s what you can add to this:
Share this
Share your love by sharing this
Do you like our article, share it now
Next option is “Placement” with which you can select the places where to display your standard buttons.
With this, your standard settings are complete.
Save the settings modification by clicking the “Save” button.
Here is the result.
After standing sharing buttons, we will setup the floating sharing buttons in the next section.
Now, setting up the Floating Share Button
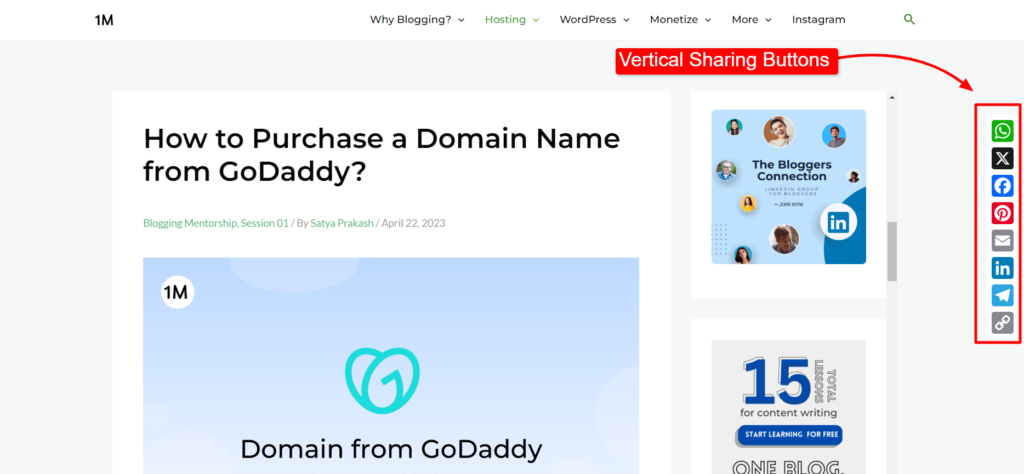
Like I said before, floating sharing buttons are two types: Vertical and horizonal. Let’s first check the vertical.
First option is the placement; pick for right or left based on which side of the screen you want to show.
Responsiveness hide or show these vertical sharing buttons based on whether your readers are reading in mobile or desktop. You can hide these buttons from the screen if the screen is narrower by certain pixels.
Position and offset allows sets the pixels from the top and side of the screen. Set 200 pixels to show it in the middle.
By default, set 32 pixels for the size.
Save all the settings, and refresh your website to see the final floating social share buttons.
Similar to the vertical floating buttons, set the respective settings for the horizontal settings options.
Save all the settings.
Pro tip: Horizontal floating buttons are best for the mobile screen while vertical floating buttons are best for desktop screen.
End Note
With the steps above shared, your social sharing buttons are fixed at the desired places. Hopefully, you will start to see the benefits of these buttons.