Learn to add a paragraph with the help of Elementor in a few simple steps and start drafting your first article.
Are you drafting an article in Elementor Editor for the first time?
We have already learned to add and edit headings in Elementor editor, let’s learn to add and customize paragraphs.
Before starting to draft an article on WordPress, ensure that you have written complete article in a Google doc file. You can use MS Word file as well (if you are more comfortable with it).
Note: Some expert blogger writes directly in WordPress in Elementor Editor, but I won’t recommend you following this pattern as a beginner.
So, let’s learn to add and edit paragraphs of your article from Google Docs to WordPress editor. In your browser, open your article’s doc in one tab and Elementor editor in another tab so that you can switch between them easily.
1. Add “Text editor” in Elementor
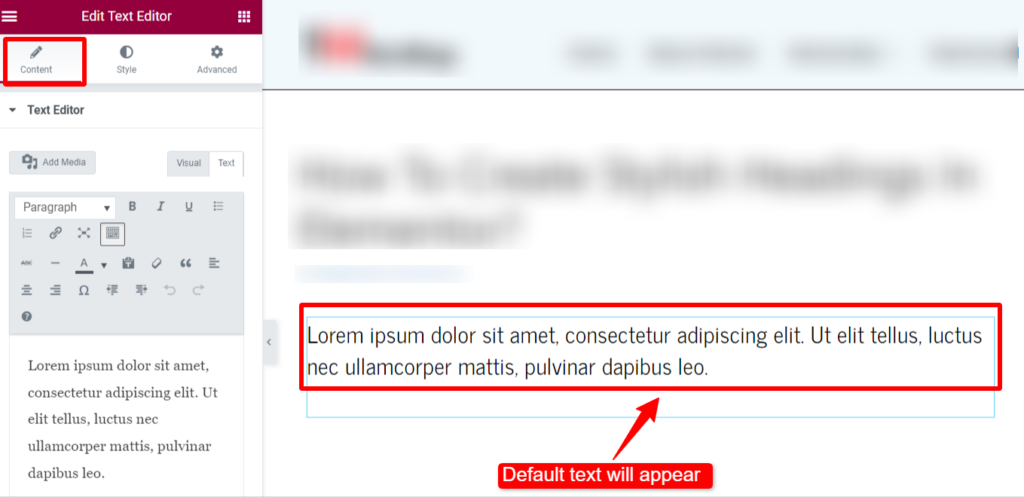
To add a paragraph you have to click on the “+” sign and select single block structure. A list of widget elements appear on the left panel. Drag and drop the “Text editor” element.
Your “text editor” will be inserted with default text (as shown below in the screenshot):
Let modify the text.
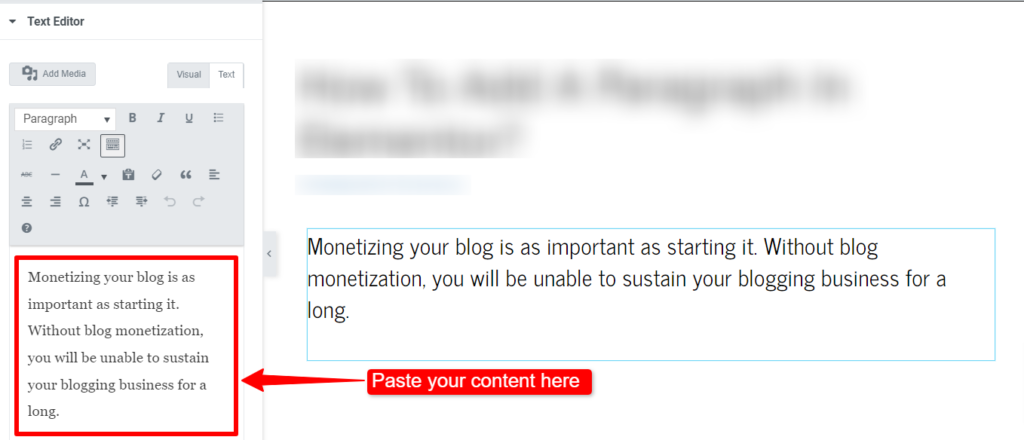
2. Type or paste the text
Copy your blog’s paragraph from Google Docs and paste it in the left side editor panel.
Note that you have to copy a series of paragraph that are separated by either image of heading.
3. Clear the Old formatting (*Imp.)
Any paragraph copied from other editors or platform is not just text but also its style, such as bold, italic, underline, font size and font weight, etc. These extra formatting needs to be removed after its pasted to WordPress editor or Elementor.
To remove these formatting, click on the “Toolbar Toggle” icon. Select the entire text in the editor (use the shortcut, ctrl + A), and click on the “Eraser” icon. It will clear the formatting by removing the text’s bold, italic, or underlined parts.
It is done to avoid extra coding on your web page. This reduces the size of web page, improves the page speed, etc.
Once old format is cleared, its ready to add to add your new format.
4. Format your text
Explore various options to format your text. Click on the “Toolbar Toggle” icon to extend more options for formatting such as:
Add images or GIFs by clicking on the “Add Media” tab. You can select the formatting from heading 1 to 7, or paragraph.
Make your text bold, italic, or underline it.
Arrange your list by using bullet points or numbering.
Expand the editing section to a full screen.
Increase and decrease indent.
Add quotation
Add text color
Strikethrough your text
Based on your requirements, use it.
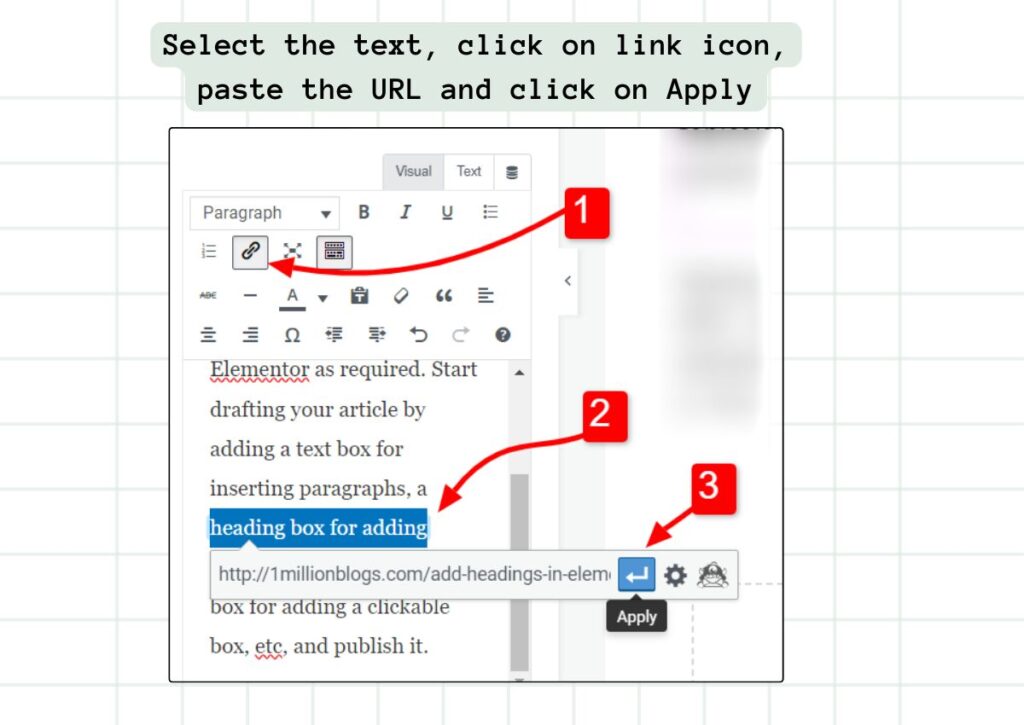
5. Link the URL of other web pages
To add internal or external links on any anchor text of your paragraph. Follow the steps.
First, select the text on which you want to add the hyperlink and click on the “link” icon or press “Ctrl+K”. A popup box will appear. Paste the URL of the webpage that you want to link. Finally, click on the apply icon.
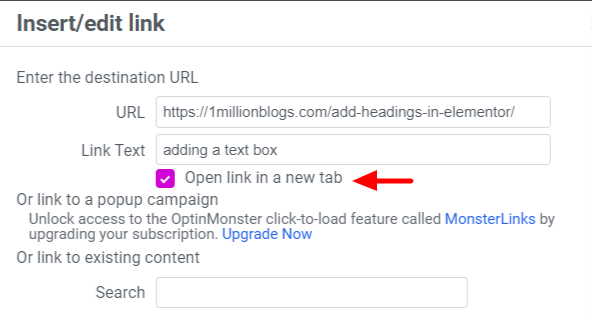
Your link will be inserted and the linked text will appear in blue (or color you have set for hyperlinks).
If you want the linked URL to open in a different tab, then click on the “Settings” icon and tick mark the “Open link in a new tab” option.
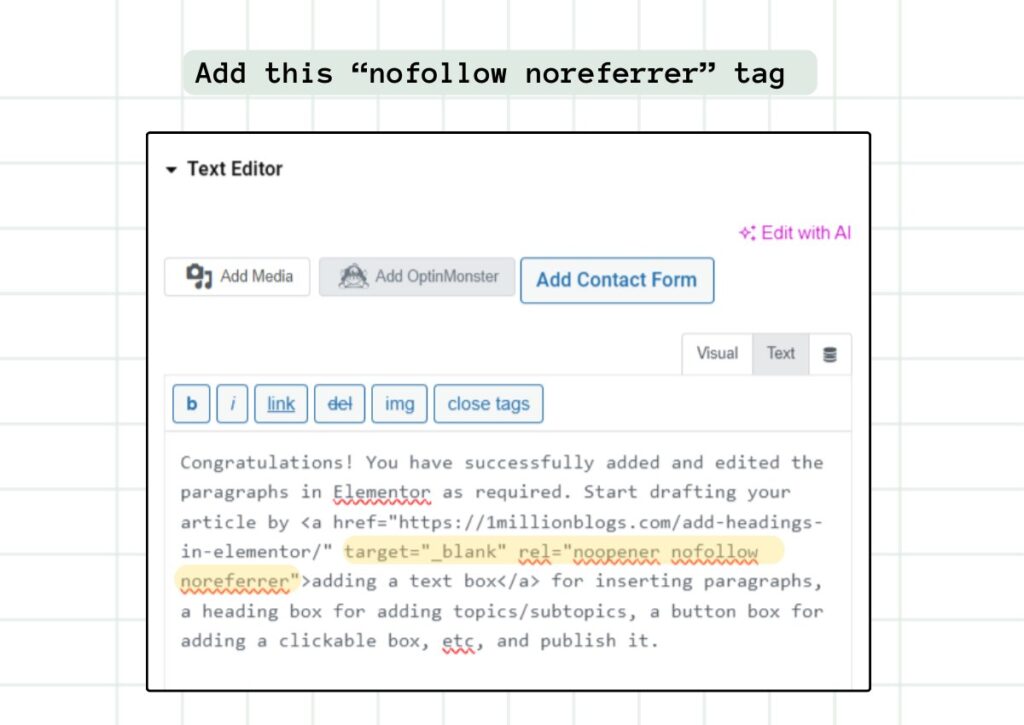
Now find the inserted URL and type “nofollow noreferrer” after “noopener” as shown below.
<a href=”https://1millionblogs.com/add-headings-in-elementor/” target=”_blank” rel=”noopener nofollow noreferrer”>adding a text box</a>
You have successfully applied nofollow tag.
6. Change the “Style” of your paragraph
Change the looks of the paragraphs by clicking on the “Style” menu. A few options will be there such as:
Alignment: Change the alignment of the paragraphs from left, right, center, or justified.
Text Color: Change the color of the text however you want.
Typography: Change the font, size, weight, spacing, etc of the text.
Text Shadow: Apply shadow behind the text to give dramatic effects.
Note: You can also select text color and typography from the global option by clicking on the globe icon.
8. Use the “Advanced” option to format the paragraphs
Explore the advanced menu to format the paragraphs with some extra options.
Layout: Adjust the margin, padding, width, or position of the text box either left or right.
Motion effects: Add some animation here along with its duration.
Transform: Rotate or flip the text box as you like.
Background: Change the background of the box with single color or two-color design.
Border: Apply the border here by choosing a particular size, color, and different design.
Mask: Change the shape of the text box from a circle, triangle, flower, etc.
Responsive: Use this option to hide the button on a tablet, desktop, or mobile.
Attributes & Custom CSS: To use this option, you have to upgrade your editor.
Conclusion
Congratulations! You have successfully added and edited the paragraphs in Elementor as required. Start drafting your article by adding a text box for inserting paragraphs, a heading box for adding topics/subtopics, a button box for adding a clickable buttons, etc, and publish it.


Now I completely understand how I can use Elementor for making a website, it’s really friendly plugin.
yes, Elementor is quite simple to use. Within few days, you can become expert of elementor.